Products

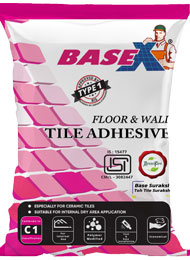
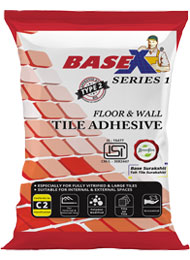
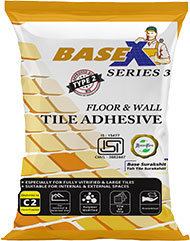
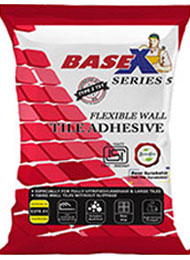
BASE-X Floor and Wall Tile Adhesive
Advantages
- Fix fully vitrified tiles and natural stones of all types, size and format on interior and exterior floor.
- Complies with EN / ISO with a C1 classification
- Exceeds ANSI A118.1 shear bond strength requirements
- Easy to Use
- Confirms IS 15477:2019 Type 1 Adhesive standards
- Can be used up to Maximum 12mm bed thickness
- Improved impact resistance
- Self curing adhesive
- High bond strength
- Increased flexibility
- Easy to Use
Product Description
BASE-X Premium adhesive is a high polymer modified thin-set tile adhesive, specially formulated for fixing fully vitrified tiles and natural stone of all types and size on floor. The adhesive can be used for fixing ceramic tiles on wall and is suitable for dry as well as wet areas for internal application. This is also suitable for tile-on-tile application for fixing vitrified tiles on pre-existing ceramic tile floors.
Application
Designed Specially for interior,exterior floor installlations of all types of ceramic tiles,vitreous tile,precast terrazzo and large format tiles over concrete and a variety of substrates.
Coverage (in sq. mtr.)
Approx 45-55 sq.ft per 20 Kg bag with 1/4" x 1/4" (6mm x 6mm) square notch trowel. Coverage will vary depending on trowel notch size, type and size of tile and substrate.
Technical Characteristics
Tests
Our Offerings
BIS Requirements
Tensile Strength
1 : Dry Condition
1.4 N/mm2
1.0 N/mm2
2 : Wet Condition
1.2 N/mm2
1.0 N/mm2
Shear Adhesion
1 : Dry Condition
1.45 N/mm2
1.25 N/mm2
2 : heat aging Condition
1.2 N/mm2
1.0 N/mm2
3 : Wet Condition
1.3 N/mm2
1.0 N/mm2
Conformity
TYPE 1 / C1
- All Surfaces should be thoroughly cleaned using stiff brush to remove dust and loose particles, paint residues, wood pieces and molds,
Oily stains, grease, etc. - Concrete Surfaces should be properly cured with water before fixing tiles.
- All Surfaces Should be pre-wet to ensure no moisture be absorbed from this Tile Adhesive during application.
- It should be mixed with clean potable water only.
- Mixing should be done in a clean plastic or non-corrosive metal bucket.
- An electric mixer with low rotation speed (200-300 rpm) is preferred to achieve a good and homogeneous mix.
- Mixing ratio is around 5.5 – 6.0 Liters of water per 20 Kg which can be adjusted as per site application conditions.
- Mixing is to be done until a uniform lump free paste is obtained.
- Once mixed allow the mix to rest for about 5 minutes and to be re-mixed again before commencing the application.
- Care should be taken that further water should not be added to the mix once set. Also Hard and set paste should not be remixed or reused
- Apply Series 5 tile Adhesive evenly on the substrate with a uniform thickness using a notched trowel, then adjust it to the desired thickness according to the size of the tile.
- Apply the Tiles onto the Adhesive bed with a slipping movement with enough pressure to ensure all tile surface is in contact with adhesive bed.
- Series 5 is recommended to apply this on the substrate by areas of < 1 m² each which need to be tile fixed within a maximum of 10 minutes from application time at standard conditions. Spreading large areas of application without fixing tiles may lead to drying of the adhesive before tile fixing and eventually may reduce its bonding capability.
- Upon finishing, excess adhesive need to be removed with wet cloth before it dries
- Care should be taken not to use set adhesive or remix with water.
- Ensure to not use it on metal, gypsum and other non-absorbing surfaces
- It is preferable to make sure to clean the surface well before applying the adhesive bed as it contributes to final adhesion strength
- Refrain from application during rain, unstable weather conditions or under direct sun light.
- Shelf Life: 12 Months from date of manufacture if covered well and stored in pallets, away from heat, Sun light and moisture.
- Care should be taken that hard & lumpy materials are not to be used.
BaseX contains cement which becomes strongly alkaline upon mixing with water and this may cause skin irritation when exposed for very long time. Avoid contact with eyes and inhalation of dust. In case of skin/eyes contact, wash with plenty of clean water and seek medical attention immediately. It is highly recommended to use all relevant Personal Protective Equipment while handling it and work in well ventilated conditions while applying it. Keep out from the reach of children.
* Please refer to the Material Safety Data Sheet for more details.
Frequently Asked Questions (FAQ's)
Choosing the right tile adhesive matters on the right coverage area provided by the brand who is offering the product. It totally depends on the size the notch trowel, before applying the tile adhesive you must ensure to refer to the technical data sheet of the given product. Refer the brochure or the website to see the same. Also other important key factor is to see whether the product is of thin set mortar and also the product should be cement mixed…. Many brands are offering these product with a different price tags. Would recommend to use BaseX thin set floor and wall Tile adhesive for all your house and commercial use.
Without additive to help retaining water, mixture of sand-cement dries fast and then causes the difficulty to adjust the tiles after being laid. This leads to aesthetic problem of the line of tiles and also poor bonding strength, which will be the reason of de-bonded tiles later.
Laying tiles traditional way by applying sand- cement mixture in lump at tiles’ back will create voids underneath the tiles and water can seep through. This creates white stain problem. Moreover, tile will be fragile at the area without any adhesive underneath
Thick layer of sand-cement mixture must be used to lay tile traditionally in lump and/or to adjust the floor level, in order to gain its bonding mechanism. There will then be more loads onto structure. Moreover, there will be material wastage since the mixture dries faster than the application.
It means that the adhesive does not have a good bond between the tiles and the substrate, or that there are hollow voids of missing adhesive under the tiles. If tiles are laid correctly and there is 100% adhesive coverage, and the bond is sound, then the tiles effectively become one with the substrate.
As the floor is used and subjected to foot traffic, the tiles that are not correctly laid will most likely break, crack, chip, or fail in some other way. In extreme circumstances, the tiles will actually lift off the floor.
What can cause the problem?
Drummy or loose tiles can be caused by a number of reasons including:
Not enough adhesive under the tiles, or ‘dobbing’ of the adhesive under the tiles. This leaves hollow voids.
The wrong adhesive has been used and it has not bonded with the tiles or substrate. Or, in wet areas, the adhesive is not suitable and has broken down.
The adhesive has skinned before the tiles were laid. This means that the adhesive was put down and left too long and the surface has dried. This prevents a sound bond to the tile. If the suspect tiling is over a timber floor, then the incorrect adhesive may have been used. Special adhesive must be used for a permanent and sound bond over timber, and the instructions followed closely. Excess movement of the floor boards can also create a problem, especially if the adhesive is not a ‘flexible’ product.
So what is the solution?
The bad news is that any drummy or loose tiles on a floor will cause problems down the track. This situation is not a fault of the tiles; the builder, tiler or tile retailer must take responsibility.
If the retailer specified the wrong adhesive, then that needs to be corrected. The first step is to talk to the retailer and check the suitability of the adhesive.
If the tiler has supplied the adhesive and it is not suitable, or he has let it skin, or he has not prepared the floor correctly; then he will need to correct the problem.
Likewise, if there is excessive ‘bounce’ in the timber floor, then the builder or tiler needs to rectify the project. The excessive floor movement should have been fixed before the tiles were laid.
Efflorescence often manifests itself in the cement joints of new brickwork. Numerous studies have been made around the world to try to determine why it can appear on one installation, and not on another under apparently identical conditions. One of the few things we do know are that it happens when Portland Cement is present, and that there is no real solution for it. Efflorescence does clear up over time unless there is an ongoing issue with rising damp from the substrate. It is defined as the ‘migration of soluble salts.’
This is not due to substandard tiles, adhesives, or grout; and generally, there is nothing to worry about.
What can cause the problem?
As explained, is it simply soluble salts that are present in the cement based product. This can be the concrete, mortar bed, tile adhesive, or grout. These rise to the the surface, and as it dries an annoying white powder remains on the surface. The grout is the weakest link in the floor surface, so this is where the salts will migrate.
So what can I do now?
The only real solution is to brush the grout with a stiff bristled brush and vacuum away. Repeat this from time to time, and eventually, it will generally stop recurring. You can also wash the area with a 50/50 mix of water and Phosphoric acid. Apply, leave for two minutes and then rinse thoroughly.
Some people advocate brushing the salts away and then applying a grout sealer. While these are great products and are worth using in many situations to keep your grout clean and seal out dirt, these products won’t always stop efflorescence.
The most common cause of this is that people wash their floors using too much water and detergent. The dirt is washed off the tiles and collects in the grout joints. It settles in these mini gutters and dries out leaving a film of dirt and detergent. Each time the floor is washed, this film builds up and eventually causes the grout to appear black. In truth, the black is just the film of grime sitting on top of the grout.
In some areas where there is ongoing dampness, such as a bathroom, this film is an ideal breeding ground for mould.
Whenever you wash a floor using any form of detergent, rinse it well with clean water. Most soiling on glazed ceramic tiles will lift off with plain, clean, warm water. The only thing we recommend that you add to the water is a drop or two of disinfectant (or a splash of vinegar) to kill any germs. Any greasy or oily marks can be cleaned up as a spill. For overall cleaning, leave the detergent in the cupboard.
So what can I do now?
Visit your tile store and purchase a bottle of Tile and Grout Cleaner. View DuraPro tile cleaning products. Use them to wash the floor (and rinse several times) to remove all the built up grime.
From that time on, avoid detergents and just use warm water. Always use the water sparingly; there is no need to flood the floor.
Once the floor is thoroughly clean and dry, it might be wise to seal the grout joints with a grout sealer. Once light application using the trigger spray will seal the grout joints and make them water repellent and easy to clean for around five years.